Handmade wooden wading staff

coyoterahn

coyoterahn

Well-known member
Joined
Oct 1, 2019
Messages
500
Location
Central Pa
I am going to start making a wood wading staff. I’m currently drying a piece of a hickory limb I trimmed from one of my trees.
Does anyone have any suggestions or tips to get me started in the right direction. Any advice is appreciated. Thanks in advance.
 
I wouldbe curious to what others say here too. I had thought of doing tgis myself.

Id imagine a good outdoor spar varnish is a must.
A nice comfortable grip and some kind of protection at the bottom for rocks.

Be interesting to see what others say.
 
Sal,
I’m curious as to what others will have to offer. I’d like to etch/burn a small trout into it also. However, my artistic skills are limited. It may end up looking like a creek chub! Thinking also to keep the tip wood. The one thing I don’t like about my wading staff is the noisy metal tip.
 
Oh ya!
I bet a metal tip will make a good noise spooking fish from pretty far away.
I was thinking some kind of rubber end cap.
 
I've used home made wading staffs/walking sticks for many years. Here's what I have come up with so far...

- I use a wooden dowel (can get at a home supply or lumber yard) that is an inch in diameter and cut so as to have the handle slightly higher than my belt line with the end on the ground.

- The handle end is a bicycle grip with lanyard so that I can clip it to my fishing vest.

- On the "ground" end I glue a rubber furniture cap and drill several screws in for stud traction.

- Note in the pic of the handle, there is a wing nut on a bolt; note also that there is a bolt with a nut down by the ground end. The bolt at the ground end with the rubber washer under it is there to provide a mount for my underwater camera - a video selfie stick adaptation in effect. If I want some underwater pics or video, I just screw the camera on to the end of my stick and plunge it under water.

- Also, if you look carefully just above the bolt near the ground end, there is a slightly recessed spot that has been rubbed down with a rasp (on two sides of the stick). This is to fit my landing net. I keep a plain old radiator hose clamp in my vest and if I want to turn my stick into a long handled net I can simply clamp the net handle to the end of the stick and tighten the clamp. This holds up well (just remember to have a screwdriver or a coin to tighten the radiator clamp).

- The wing nut under the handle grip is screwed on to a bolt. This is simply a storage spot for the wing nut. If you need to pull down a tree branch or fish up a snagged fly, I unscrew the wing nut and put in on the other end on the camera bolt. The wing nut forms a nice little hook that you can use to grab or snag branches.

You can build a tough wading staff like this for a few dollars and it will last many years. I use it as a hiking stick as well.
 

Attachments

  • IMG_0153.JPG
    IMG_0153.JPG
    109.7 KB · Views: 59
  • IMG_0155.JPG
    IMG_0155.JPG
    57.1 KB · Views: 58
Nice Dave, thank you! I like the rubber end cap idea too. Prevents the end from getting mashed down. I’m thinking of wrapping para cord for the handle but if that doesn’t work, I may try the handlebar grip idea.
 
The only thin I would add is if you use a natural limb or branch, peel the bark and treat the wood "meat". Don't just treat over the bark. ultimately, water will get between the bark and the wood and you will get separation.
 
I would use Tung oil.
I would select Sassafras's as it is light. I you're lucky walk the fence lines in your area and you surely find a sassafras that had Honeysucle vine girdling it in a spiral 9very easy to find in PA).

Oil is instantly retreatable without sanding. Wipe on and wipe of in 20 minutes......dry 24 hrs and repeat 12 times. Beauty.
 
Thanks for the idea guys. Will be starting with hickory, have begun the sanding process. Also will keep my eye out for sassafras. Haven’t seen that in a long time.
 
Keith Pickering 
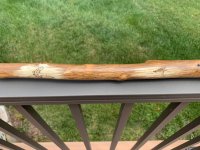
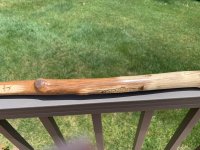
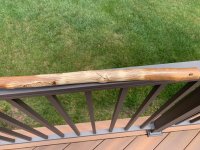
“The Stick Man” in the UK makes wonderful wading "sticks" out of wood.

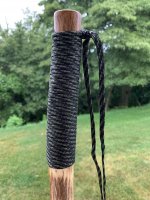
One of the ideas he incorporates into his sticks is weight in the form of lead wrapped around the stick near the bottom and coated with rubber. This keeps the wooden stick from floating behind you and becoming tangled with your fly line.

Another thing to consider is a rubber or wooden tip while quieter than metal, can be slippery as heck in certain places. I made a few WALKING sticks for some of my senior friends. I made them from heavy-duty varnished hardwood broom handles, available at any hardware store, drilled a hole at the top and added some paracord for simple lanyard.

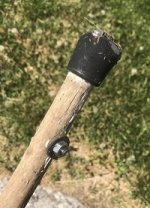
To add a spike for ice, I simply drilled a pilot hole in the bottom/center, screwed in a #12 or #14 long shouldered stainless steel sheet metal or deck screw that I WAXED first so just the shoulder was exposed. Then I cut off the head of the screw with a Dremel Tool leaving the shoulder exposed about 3/8” and sharpened it.

Conveienienty, a rubber crutch-tip fits perfectly over the broom handle and spike and coincidentally, I found that a plastic backed 3/4” self-adhesive felt pad for a chair leg fit in the bottom of the crutch-tip which keeps the spike from poking through. A couple of stacked stainless steel washers glued in the bottom of the crutch tip would also accomplish the same thing AND add a little weight.

When the spike gets dull, I re-sharpen it, when it is worn, I use Vice Grips to back it out (which is why I waxed it originally) and I just put in a new screw and make a new spike.

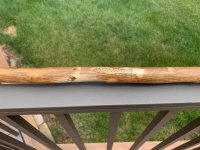
I think the walking sticks cost me a few bucks to make out of a nice varnished broomstick and the other parts were available at a hardware store. I see no reason why the same thing couldn’t be made longer and called a wading staff.

Good luck!
 
Has anyone used a ski pole?
 
Well, I’ve been working on making a wood wading staff from a piece of hickory limb which I debarked. I decided to burn some images in with a wood burning tool. I learned not to try to burn over wood stain because it creates a lot of carbon. So I re-sanded the areas I wanted to burn. It actually made the pic areas look better in my opinion. After burning the images, I coated with 7 coats of satin polyurethane.
I’ll try to attach some pics but I haven’t done that on this site. I hope I have them properly resized.
 

Attachments

  • E9BB872D-C026-4E6E-B4D8-738BF58B1C9F.jpeg
    E9BB872D-C026-4E6E-B4D8-738BF58B1C9F.jpeg
    144 KB · Views: 34
  • 1B2A83AA-7CBE-48DE-9F00-6228D39E3B58.jpeg
    1B2A83AA-7CBE-48DE-9F00-6228D39E3B58.jpeg
    133.4 KB · Views: 31
  • A96A8109-1FF3-48A5-861E-31364E06C3CD.jpeg
    A96A8109-1FF3-48A5-861E-31364E06C3CD.jpeg
    148.5 KB · Views: 29
  • C71576B3-F07A-46EF-A443-E373974103FA.jpeg
    C71576B3-F07A-46EF-A443-E373974103FA.jpeg
    91.8 KB · Views: 31
  • 251A04CB-DE75-4D48-A155-086694D5D0DD.jpeg
    251A04CB-DE75-4D48-A155-086694D5D0DD.jpeg
    110.3 KB · Views: 34
Coyoterahn: I dig it. Nice burned in images. :pint:

I look forward to seeing the next phase.
 
Well I did a simple para cord handle wrap. We’ll see how that works.
 

Attachments

  • 924F1AA7-FF11-41A9-AB58-0663FB8C225E.jpeg
    924F1AA7-FF11-41A9-AB58-0663FB8C225E.jpeg
    105.6 KB · Views: 24
There is thousand reasons why having some paracord at your disposal is a good thing.

You did a great job, it is beautiful AND functional!!
 
Sweet!
 
Hello,

Just checked back in on this and i absolutely love what you came up with! Anyone would be proud to own it!
 
Back
Top