Afish and dryflyguy have it right. If you want to do it yourself, and don't have a line winder, you can do it yourself easily. Having someone to help you with this makes things easier.
These 10 steps apply to a weight forward fly line. A double taper line makes things easier, as you don't have to "flip" the fly line around.
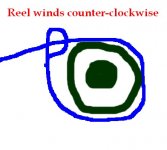
How to set up line and backing on a reel.
1 – using a small piece of masking tape, tape the end of the fly line to the arbor of the reel. Most new fly lines have a sticker attached to this end that says something like “attach this end to the reel”. This end is the opposite end from where you attach your leader.
2 – put a pencil through the center hole of the fly line spool, and hold either end of the pencil with your toes. In lieu of this, have another person hold the pencil at either end. Keeping some pressure on the outer ends of the fly line spool helps control tangles.
3 – wind the fly line onto the spool.
4 – when you get to the end of the fly line, you may have a loop on the end if your line comes with a welded loop. If not, just take your backing and tie an overhand knot with the backing to the end of the fly line, or to the loop. This is a temporary knot, so don't cinch it down too tight. You'll want to slide/cut it off later...
5 – using the pencil technique to hold the backing spool, guide the backing from side to side as you wind to ensure it winds evenly. Stop winding when the backing is 1/8 to ¼ inch from the reel frame (top and bottom). You'll need this clearance when fishing, as you can't always reel line on evenly, and high spots can occur. Cut the backing between the reel and backing spool at this point.
6 – Take the reel outside, and have someone else hold the end of the backing securely while you walk away from them, unspooling the line as you go. Depending on how much room you have, you may have to walk back to your helper and have them hold the line nearer the reel again. Repeat this until all the backing and fly line are unwound from the reel. Let the line and backing lay neatly on the ground. You can do this indoors, but make sure the “loops” of line are laid neatly on the floor, side to side, so you don't get tangles when reeling back on.
7 – cut or pull off the temporary knot at the fly line/backing connection. Attach the backing to the now empty reel arbor with an arbor knot. Wind the backing onto the reel evenly.
8 – attach the remaining end of the backing to the running line end of the fly line with a nail knot. The running line end of the fly line usually has a sticker attached that says something like “attach this end to reel” when new. It is the opposite end of the fly line from the end you attach your leader to.
9 – wind the line onto the reel completely.
10 – attach your leader to the end of the fly line using whatever method you prefer. Wind the leader on the reel, and you're done.