Ramcatt wrote:
i'd say the issue is more your shot composition rather than camera issues. Both of those shots have such a range of light, the camera on auto is just trying to fin some middle ground. and the result is an exposure problem.
Correct, this is again, because all light meters function the same way. They take an image, and then try to match to a middle tone, calibrated to Kodak 18% Grey. The entire backbone of the classic Zone System, the exposure bible of the pros, is based around this and sets that middle grey to what they called Zone V.
The basic concept was to set what YOU wanted as baseline for exposure to Zone V, and then to manipulate the settings of the camera's shutter and aperature to set this number to expose for, and then using push/pull development techniques to help allow for your tonal exposure to get the proper range in your picture.
What does this mean for you in the era of simple point and shoot? Your camera will take a reading, and then based on the settings of the camera, average them out for that 18% Zone V exposure. You can use the EV fuctionality of your camera to manipulate this (or, again, the built in program submodes which will take care of it for you without your direct intervention).
Now, to go onto Kevin's images a bit...
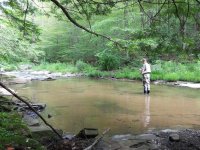
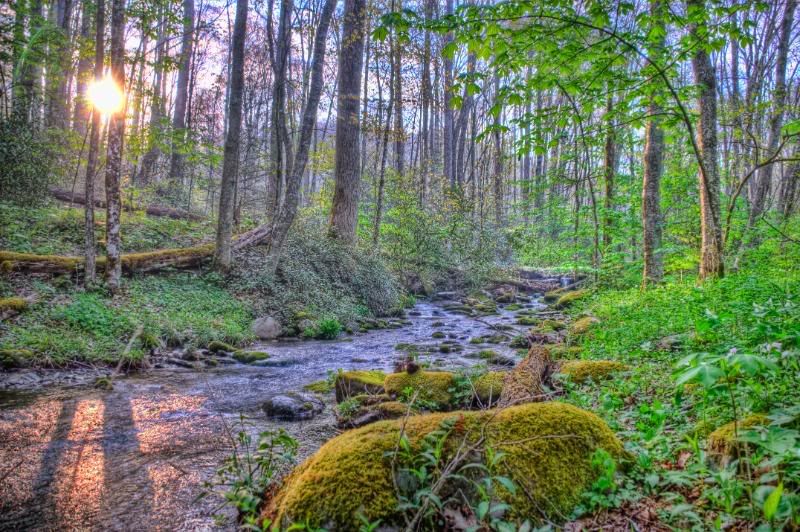
Both of these could take advantage of proper use of filters to help enhance things. Your first picture is a prime example of when ND (Neutral Density) filters would be used, specifically a Graduated ND.
Found in a square format (ie, the Cokin gel system), you would set your ND up to give the most of the light blocking to the top portion of the image, graduating to little or none by the bottom of it. You could have also significantly helped things with a perspective change here. At the very top, abotu 1/3rd in, is where the sun was or was just above. This point of extreme light is washing everyting out, and without using a graduated ND, simply re-orientating your view would've cut it out of the camera's metering algorythm and would've let the rest of the image look fine. Shadows and highlights are great in the bottom of the image, but that one point at the top is blowing everything out, and in my opinion (note the use of opinion, here), ruins the effect you get at the bottom while even with proper exposure provides nothing.
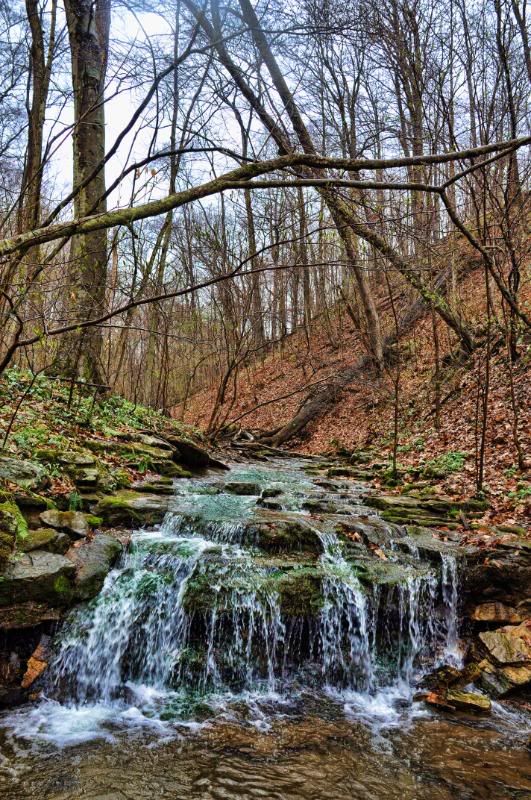
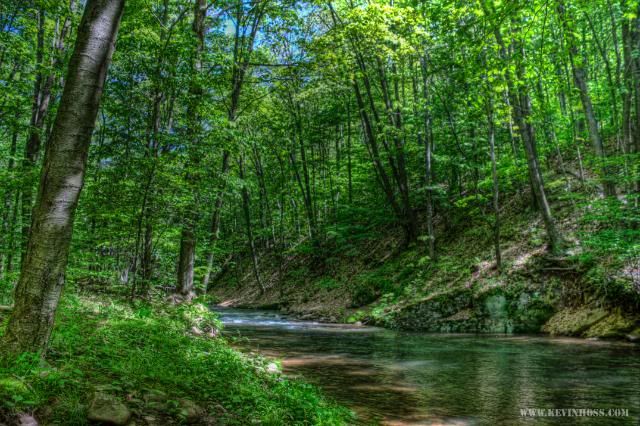
The second image is different, and while a graduated ND would've helped, I have the feeling a polarizing filter (speciecially a Circular Polarizer for automatic focus cameras) would've done you a huge benefit here.
Polarizing filters will help your colours show more, and darken the blue sky significantly. There's otehr ways to acheive this, such as with a heavier Skylight filter (1b or 1c, IIRC the Wratten system right), but a polarizer is a fantastic and highly useful filter to carry with you if you plan on taking alot of pictures.
Much harder, obviously the sun is part of what you need here. In Ye Olde Days, we'd have had to work in changes to the development to try and contract your zones and give you more detail in the shadows of the left trees, while preserving the details and exposure in the right side rock. Not sure what you could've done here, but if it were me, I'd have still tried exposure compenstation, polarizing (mostly useless here due to the fact that the light is front on) and maybe even gotten crafty with the graduated ND on its side, which probably would've been fail.
That all would've failed, meaning you're stuck in the darkroom trying to fix this. Or, Photoshop if you will. Dodge the sun, burn in the trees to bring out as much detail as you've captured. The failing here is that you can only bring out what you caught, meaning details will be lost somewhere.
The hip thing to do is an HDR image, then paste them together in Photochop. This would've probably have worked here, although I think HDR looks counterfit and fake, its what you got to do, I guess. I like this, BTW, alot, its just a shame you weren't able to bring it to full frution. Shooting into the sun is a pain.
edit: For those who don't know, and don't care to look it up, HDR is High Dynamic Range. Its basically two identical pictures with different exposure values, one to capture the shadows and one to capture the highlights. You then jam 'em together in a fancy piece of software to make one picture composed of both photographs, exhibiting extensive detail and colour across the whole range. Its an annoying trick that's abused into submission by Internet hacks everywhere, just like fish eye lenses.
Edit 2, Electric Boogaloo:
This here is a fine example of an HDR image next to a regular photograph. While it doesn't need to look that fake, it'll always look a bit silly and surreal. That's a fine example of just what the process does and how to do it.


")